Create Pinterest Board Covers in Minutes
This means that if you click on that link and purchase an item I will get a commission, at no extra cost to you!
Would you like to give your Pinterest boards a more professional look? Then keep on reading as I will explain in this easy step-by-step mini-tutorial how you can create Pinterest board covers in minutes!
What are Board Covers?
On Pinterest, you can create boards to collect your Pins. These boards will look like this:
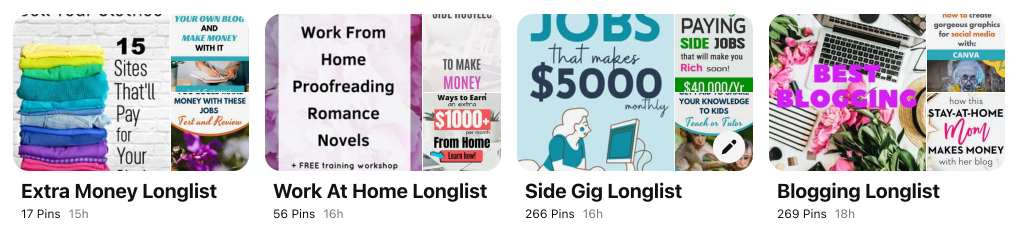 Pinterest picks these pins for you, from the pins that are on your board.
Of course, there is nothing wrong with that, but it does look a bit random. With custom board covers, you can change this, by changing the preview in the bigger square.
Why Would You Use Board Covers?
There are a couple of reasons to use custom board covers, but the most important reason is branding.
By cleverly creating and using board covers that have a uniform, branded look, your boards will look more professional and your visitors will be more likely to recognize your brand.
Pinterest accounts that have a clean and professional appearance are more likely to generate traffic to your blog.
If you use a lot of group boards, then branded board covers will also make your own boards more easily identifiable.
How to Create a Board Cover
Before we start: I can show you how to create a board cover, but how this fits your branding is up to you.
If you like to use different colors and images for each cover and it fits your branding, go for it!
Tooling
I am going to use Canva, which may not come as a surprise if you are already following this blog.
Even with the free version, Canva is such an amazing tool, enabling a lot of people to create astonishing visuals without having a creative background.
Size considerations
Eventually, we will be uploading our cover to Pinterest, in the form of a Pin.
Pinterest likes its visuals to be in a 2:3 ratio (600×900, 1000×1500), but it is not illegal to use another format.
You might have noticed that the bigger board preview image is a square.
To make sure that our board cover is always shown correctly, without it having the important parts cropped if shown on, for instance, a mobile device, we are going to use 600×600 as the default size.
If you would like to use a different format, then just keep in mind that you need to have your cover content visibly in a square space. You will not be able to fit a rectangular image into the dedicated square when positioning your cover.
So, back to Canva.
- In Canva click on ‘Create a Design‘ in the upper right corner.
- At the bottom of the drop-down click the button ‘Custom size‘.
- Enter 600 for the width and 600 for the height. Click ‘Create new design‘.

What we are going to do now is to create a design template that we can reuse over and over.
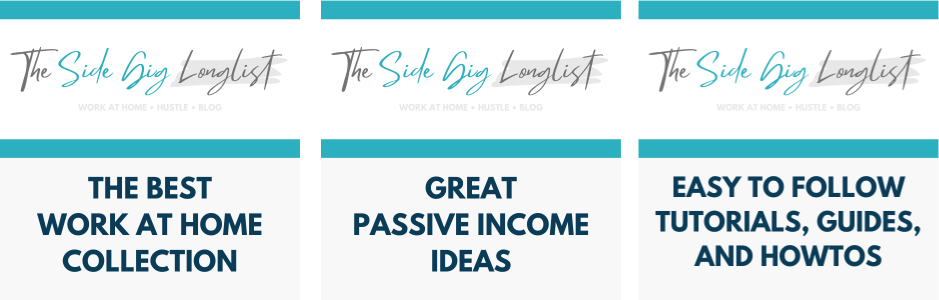
For the Side Gig Longlist, the template consists of two parts.
A top-half with the logo on a white background with a blue bar above and below it.
The bottom-half has a more grayish background and only contains the text.
Let me take you through the steps to create a more generic template. As an example, I am going to use a (fictional) blog about Greece (I love Greece!)
Pick a background
This can either be a specific color, preferably one that is in your brand colors, or an image.
Canva has a lot of high-quality images you can use. And even those that are available in the free version are great! We will pick one for this example.
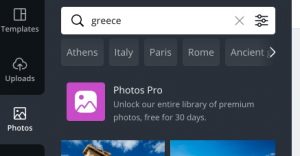 You can find the photos in the left menu bar.
In the Search input field, we will type ‘Greece’.
In the list, the search results with all images about Greece will appear.
Images that have a ‘crown’ icon are only available to the Canva Pro users. Those are awesome, but we will pick a compelling image from the free ones.
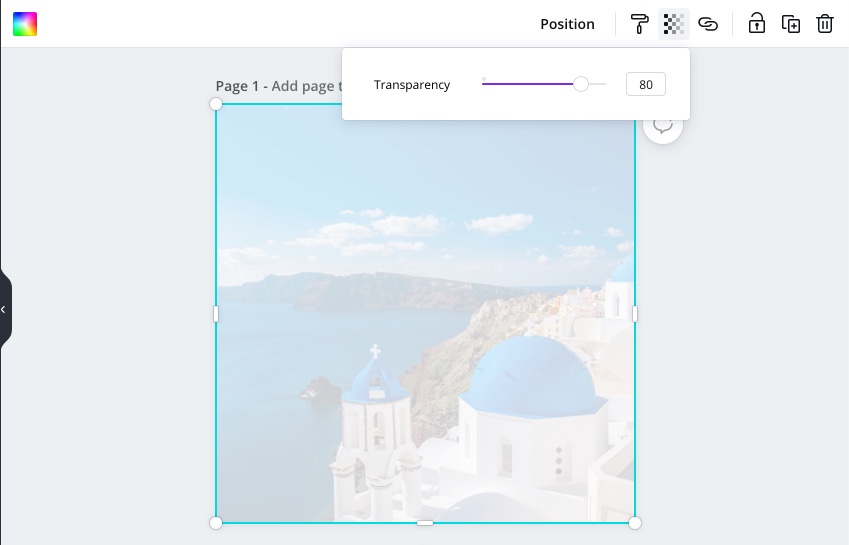
Now click the image you want to use and using the control handles on the corners, scale it so that it will cover the whole area of our template.
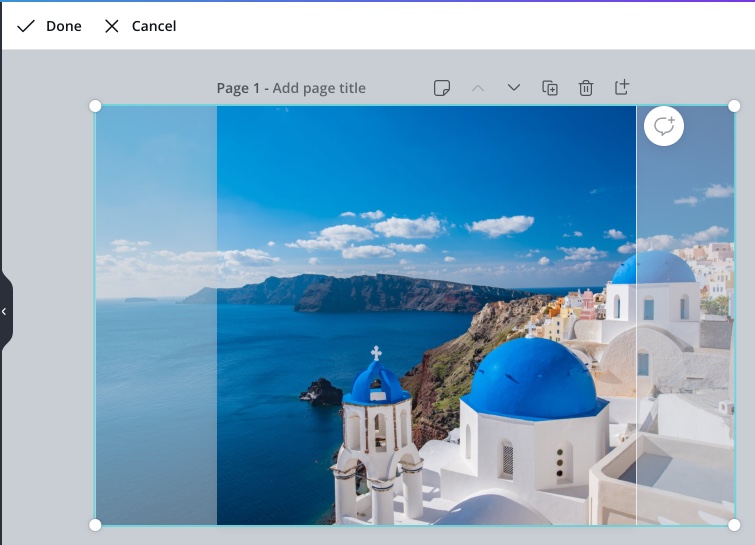
And although I love the colors of this image, I do not want them to distract from the text we are going to add later on. Therefore I am going to add an overlay to create a ‘white wash’.
Select ‘Elements‘ in the left menu and look for the free ‘rectangle‘ in the ‘Shapes‘ section.
Click it and resize it. If your rectangle is not in the color you want, you can change that with the ‘color’ icon at the upper-left.
I changed the transparency to 80%, but it’s all up to personal preferences and the type of image you are covering.
Creating a background for text
We will also need to create a background for the title of our board cover.
As I would like to give it a bit of contrast between the text color and the background, I am going to add a colored rectangle on top of the image, using the same steps as the overlay.
This is an opportunity to select a color that represents your brand.
In this case, the blue of the Greek flag seemed appropriate.
Don’t forget to set some transparency. let the image just show through.
Creating the title
Finally, we need to add some text.
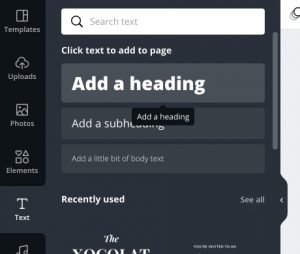 Find the ‘Text‘ menu on the left, select one (I chose ‘Add a heading‘).
Make sure that it is positioned inside the area we created for the text and type a title.
You could copy the name of your board, which is often done, or you could add a text that supplements the board name.
For The Side Gig Longlist on Pinterest, I didn’t want to repeat the board name, so I entered a text that says something about the purpose of the board.
The choice is yours.
With the text selected you can pick a suitable font. If possible, use one that you already use on your blog (in your brand).
For this one I picked one that had a Greek vibe.

Re-use the Design
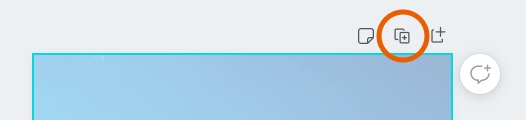
As you want to use this design on multiple boards, you will probably use different titles, which means different images.
The easiest way to do this is to create a duplicate and just enter the new text. The whole secret to creating Pinterest board covers in minutes is to reuse your designs!
You will find the option to create a duplicate above your image. Look for this icon:
Canva now creates a duplicate of the first page. You can add as many as you like and download them separately, or all together in a single zip file.
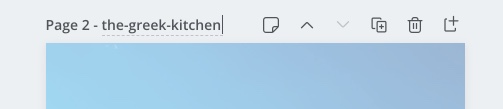
Tip: Give your pages the names of the filename you want! It will save you time renaming the files.
Try to keep the filenames SEO friendly: ‘the-greek-kitchen’ or ‘myallaboutgreeceblogname-food-the-greek-kitchen’
Now create all the covers you need and download them.
Here are my examples:

Uploading to Pinterest
To use this image as a board cover, we will have to create a Pin with it.
Go to Pinterest and click ‘Create Pin‘. Upload the image and enter a title.
I use the same text as I typed on the image as that text cannot be searched.
For the description, I recommend a description of the board.
Now publish it to the board where you want to use it as a cover.
Edit the board
Go to the board and click the Pencil icon to enter the edit menu.
Check if the title is correct and if you haven’t already, then now is the time to enter the description of the board. This is important if you want your board to show up in the search results.
For the URL you have a choice again.
It is custom to set that URL to the URL of the board, allowing others to find your board by this Pin.
Some of my pages however contain lists that reflect the contents of the boards. For those, I have set the URL to that of my blog pages.
Set the cover
And now for the final step.
Click on the ‘+’ icon in the gray ‘Board cover‘ area.
On the next screen, use the ‘arrows’ to browse to the Pin with your board cover.
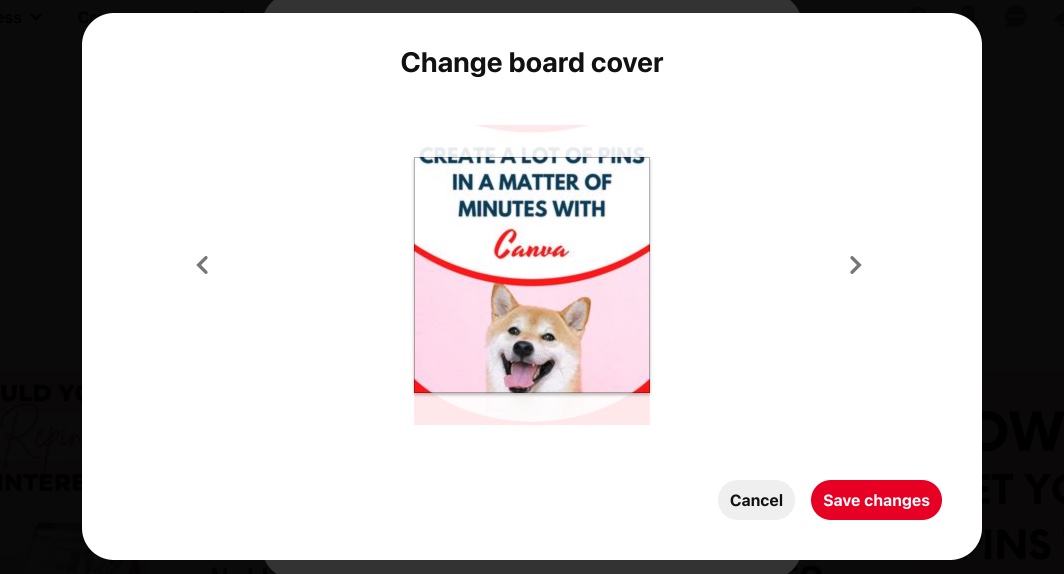
Click ‘Save changes‘ when you are done.
That is all it takes to create Pinterest board covers in minutes!
Summary
Although this post may seem a bit long, the actual steps will not take that much time.
The first design takes a bit longer, but every other cover is just a matter of changing the title. New board covers will only take you just a couple of minutes now!
It is super-easy to create these visuals with Canva. However, you can use any drawing tool you are familiar with or like.
Let’s sum it up:
- Create a new design (in Canva), preferably at 600×600.
- Add a background color or image. Add an overlay if necessary.
- Now add text and a background for the text if needed.
- Go over to Pinterest and create a Pin with the board cover visual.
- Set that Pin as the cover for your board.
Conclusion
You can create Pinterest board covers in minutes. It really takes little effort and if you created the first one, adding the others is easy as pie!
Board covers will give your Pinterest board a professional look and increases your brand awareness.
What’s Next
As always, I would like to ask you to share this article if you found it useful.
If you followed my tutorial to create some awesome covers, then drop a link in the comments!
Thank you for reading! You are awesome!